
Life Saver Project: Door-Activated Study Mode
- thestudentprojects
- May 17, 2025
- 3 min read

🛠️ The Student Projects – Your Innovation Partner
The Student Projects is a creative and passionate platform dedicated to helping engineering and diploma students bring their final year project ideas to life. We specialize in Arduino-based, IoT-based, Embedded Systems, and Python projects for ECE, EEE, and CSE branches.
From idea to execution – we provide:
✅ Ready-made projects with full documentation
✅ Custom project development based on your concepts
✅ Complete support including code, circuit, simulation, and report
✅ Help with competitions like Hackathon etc.
✅ Reasonable prices + student-friendly guidance
Whether you're building something basic or showcasing innovation, we're here to make sure your project stands out.
📍Based in Hyderabad – Projects delivered PAN India 🇮🇳
Step-by-Step Guide:
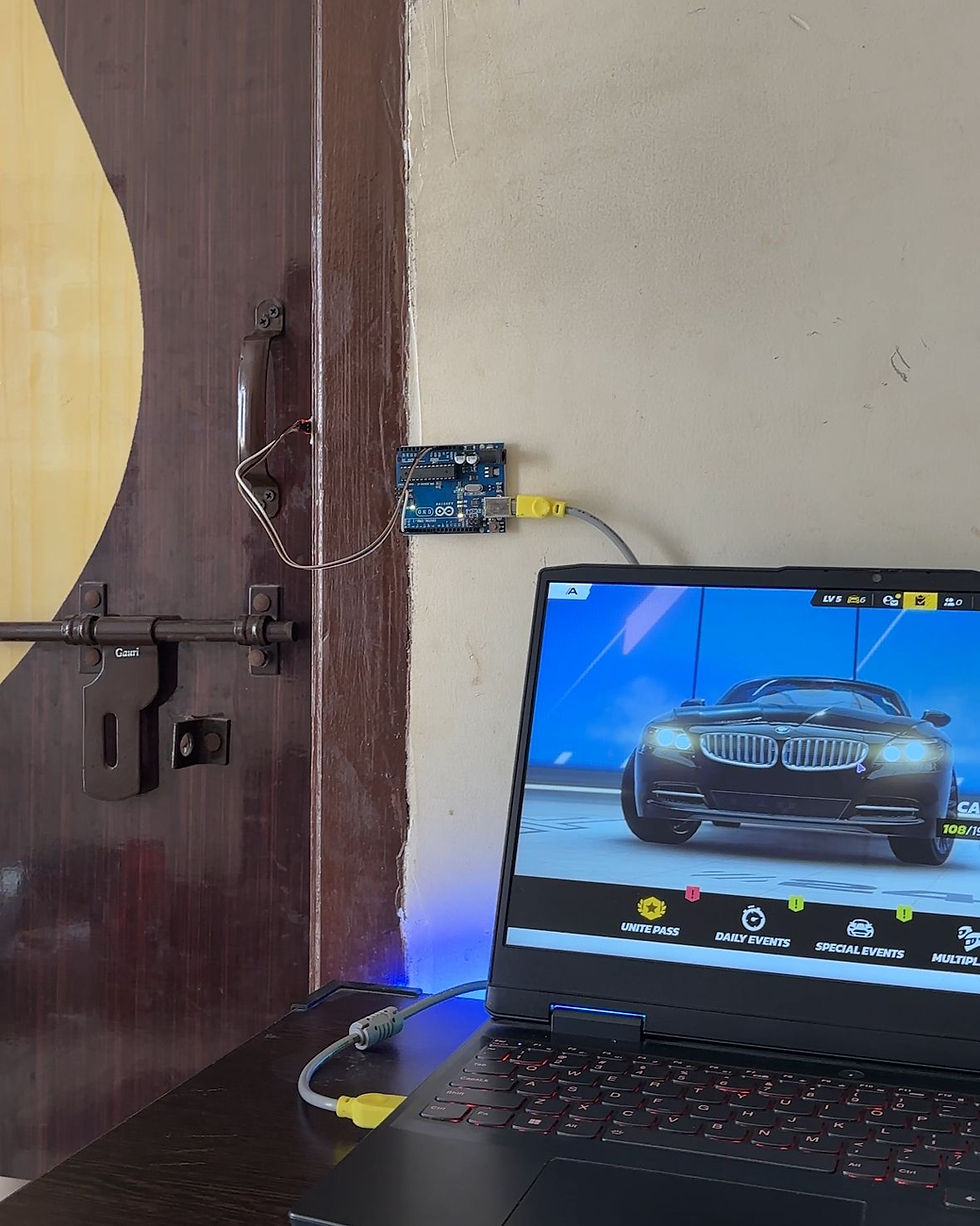
This guide will walk you through building a system that automatically switches your computer screen to a study resource when you open the door, using an Arduino, an IR sensor, and a Python script.
Hardware Setup
Gather Components:
Arduino Uno
IR Sensor
USB cable (Arduino)
Jumper wires
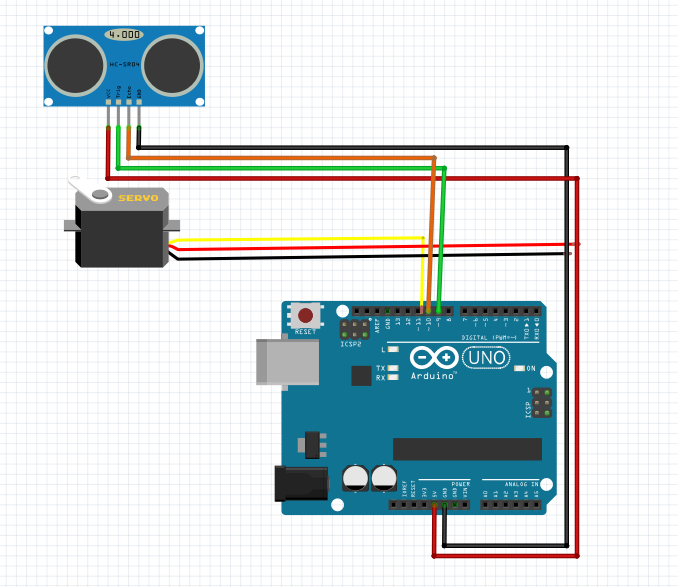
Make Connections:

Circuit Connect the IR sensor to the Arduino as shown in the circuit diagram:
IR Sensor VCC to Arduino 5V
IR Sensor GND to Arduino GND
IR Sensor OUT to Arduino Digital Pin 2
Software Setup
1. Arduino Setup
Install Arduino IDE:
Download from: https://www.arduino.cc/software
Install.
Open Arduino IDE
Create New Sketch
Copy Arduino Code:
Arduino code:
const int irSensorPin = 2; // Connect the digital IR sensor's output pin to Arduino digital pin 2 int doorOpen = false; // Flag to track if the door is considered "open" void setup() { Serial.begin(9600); pinMode(irSensorPin, INPUT); Serial.println("Digital IR Sensor Ready"); } void loop() { int sensorValue = digitalRead(irSensorPin); // Check for door opening (HIGH signal) and only trigger once if (sensorValue == HIGH && !doorOpen) { Serial.println("DOOR_OPENED"); doorOpen = true; // Set the flag to prevent repeated triggers } // Check for door closing (LOW signal) and reset the flag if (sensorValue == LOW && doorOpen) { doorOpen = false; // Reset the flag, ready for the next opening } delay(100); // Small delay }
Connect Arduino: Connect Arduino to computer with USB.
Select Arduino Board: Tools > Board > Arduino Uno
Select Arduino Port: Tools > Port > (Your Arduino Port)
Upload Code: Sketch > Upload
2. Python Setup
Install Python:
Download from: https://www.python.org/downloads/
Install (check "Add Python to PATH").
Install PySerial:
Open terminal/command prompt and run:
pip install pyserial
Create Python Script:
Create a new file (e.g., life_saver.py).
Copy Python Code:
Python script:
import serial
import webbrowser
import time
# --- Configuration ---
serial_port = 'COM10' # Replace with your Arduino's serial port
baud_rate = 9600
study_url = "https://www.youtube.com/watch?v=jNOy11yq0gU" # Replace with your desired study webpage
trigger_message = "DOOR_OPENED"
try:
arduino_serial = serial.Serial(serial_port, baud_rate)
print(f"Connected to Arduino on {serial_port}")
time.sleep(2) # Give time for serial connection to establish
while True:
if arduino_serial.in_waiting > 0:
data = arduino_serial.readline().decode('utf-8').strip()
print(f"Received from Arduino: '{data}'")
if data == trigger_message:
print(f"'{trigger_message}' received! Opening: {study_url}")
webbrowser.open_new_tab(study_url)
except serial.SerialException as e:
print(f"Error opening serial port '{serial_port}': {e}")
except KeyboardInterrupt:
print("Exiting...")
finally:
if 'arduino_serial' in locals() and arduino_serial.is_open:
arduino_serial.close()
print("Serial port closed.")
Edit Python Script:
Set serial_port to your Arduino's port (e.g., 'COM3').
Set study_url to your desired webpage.
3. Run the Project
Connect Arduino: Arduino connected, code uploaded.
Open Terminal/Command Prompt
Navigate to Script: cd to the directory of life_saver.py.
Run Script: python life_saver.py
Test: Open/close door. Verify study URL opens.
Comments